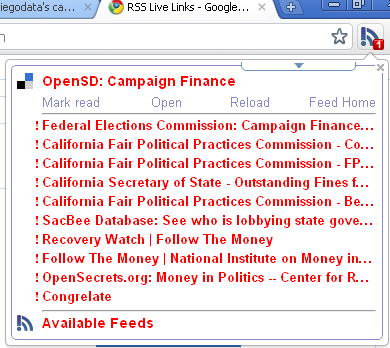
 We love to have you here, but we understand that if you’re a heavy-duty researcher, it may be even more convenient to have the best links in your browser.
Here’s how you create a drop down menu in Chrome, by using the RSS Live Links extension:
Step 1. Install the RSS Live Links extension for Chrome. When you click install, the extension will ask you for permission to install. Once you accept the installation, Chrome will display a new icon next to the address bar, as you see below.
 Step 2. Once the RSS Live Links extension is installed, come back over to the Flashlight front-page and select a category that you would like to base a Live Link on, such as Education. Then, click on the link that has an RSS icon next to it, such as “Education: All The Links”. Click on the main link, not the RSS icon.
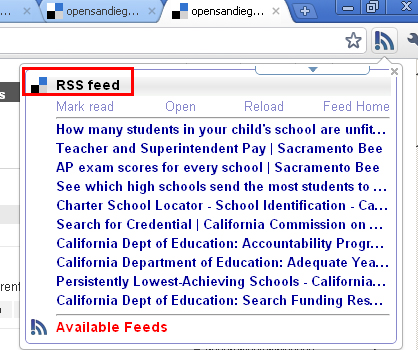
Step 3. You will be taken to the Education feed on Open San Diego’s Delicious store. From here, click the newly installed RSS Live Link icon (which was placed next to your address bar when you installed the extension in Step 1). Click the listing that says “Available Feeds”. Then, click on the sublisting for “RSS Feed”.
 Step 4. You’ll notice that after you click on “RSS Feed” it moves out from underneath the “Available Feeds” heading and instead sits on top. Clicking the newly-moved “RSS Feed” item displays a list of ten Education-tagged links. This list is dynamic; it will update itself as we add new tags. If you would like to rename this item from “RSS Feed” to something more intelligible (ie “Education Links”), or if you would like to configure how many links are shown or how often the list is updated, continue to step 5. Otherwise, you are done! Repeat from step 2 for each category (Crime, Health, etc) to your heart’s content.
Step 5. To rename your RSS Feeds or to configure how they display, click on the drop down menu underneath the RSS Live Links button, as shown here.
Next, click on the wrench!
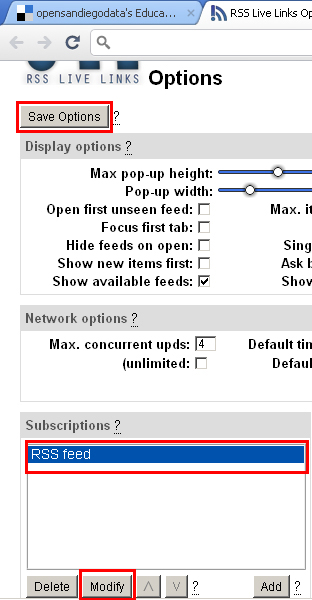
 You will have arrived at the configuration page for RSS Live Links, where you can modify the name of your selected feeds (bottom left, “Modify”) or change the appearance and workings of the whole extension. Changes that you make on this screen will not be committed until you select the “Save Options” button at the top, so don’t forget to click it when you are done! Happy digging!


